Gateway FPD2485W: 24" LCD Beauty or Beast?
by Jarred Walton on February 22, 2007 10:00 AM EST- Posted in
- Displays
Features and Appearance
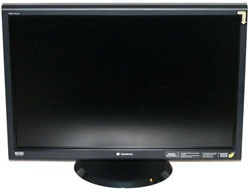
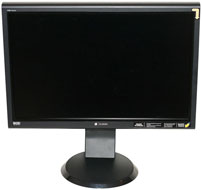
We've already covered some of the features on the specifications page, but we're going to take a closer look at the display here and provide images from various angles. Assembling the display is extremely simple: after removing the three major pieces from the box (the display as well as the two parts of the base stand), you first attach the circular base to the mounting arm and lock it into place using the provided screw on the bottom of the stand. After that all you have to do is insert the top of the LCD mounting mechanism into the stand and then lower it until it snaps into place.
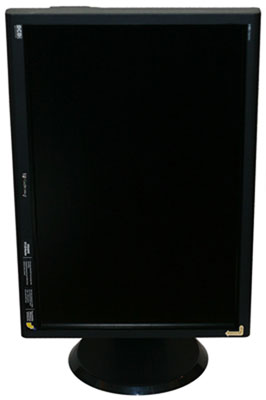
The base stand provides five inches of vertical travel, which gives you a reasonable amount of height adjustment. The stand also allows you to rotate the LCD and use it in portrait mode. While we can't say using a 24" LCD in portrait mode is something we found to be particularly useful, some people might feel otherwise. One of the great things about having such a large LCD is that it gives you the ability to view two documents (or document pages, web pages, etc.) side-by-side with room to spare, making portrait mode largely unnecessary.
With the display in portrait mode, you don't get quite as much vertical travel, and cable routing can be a bit trickier as well. The display supports auto rotate functionality, so as soon as you rotate the display Windows will automatically recognize the new orientation and change your resolution as appropriate. It is unlikely that this functionality works outside of Windows, due to a lack of native drivers for other operating systems, but we did not actually test this functionality outside of Windows; regardless, as stated already we don't find portrait mode to be particularly necessary on widescreen displays.
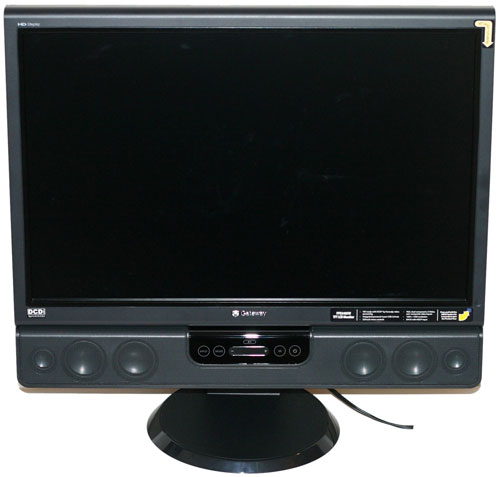
Here you can see a shot of the display with the optional speaker bar installed. The speaker bar attaches to the bottom of the LCD and receives power via a short cable that connects to the rear of the main display. The speakers only support stereo audio inputs (standard 1/8" DIN or RCA jacks), but they can try to emulate 3D surround sound if you'd like and the overall quality is pretty good given their size. There are plenty of better sounding speaker options available for $70 or less, but one nice benefit of the attached speaker bar is that you get reasonable quality audio without taking up much desk space. If you're more concerned with eliminating cable clutter than with getting premium quality audio, we would definitely add the speaker bar to a purchase of this display. The speakers also have the potential disadvantage of making portrait mode more difficult to access, so if you do intend to use the portrait mode we would forgo purchasing the speaker attachment.
Here you can see the rear of the unit, with or without the speaker bar. The back of the base stand also includes a small ring that can be used to aid in cable routing. If you would rather do without the base stand, you can of course remove the mounting bracket and use a standard VESA wall mount instead.
All of the input ports are located on the back of the unit, facing downward. One of the advantages of being able to rotate the display is that it makes it easier to install the cables initially. The only ports not located on the bottom of the display are two additional USB ports which are located on the left side. The ability to have the display function as a USB hub can be useful, although personally we prefer the integrated flash memory readers found on competing Dell LCDs. Flash memory readers are cheap, but integrating them into the display is one more way of eliminating cable clutter. If you have a flash reader integrated into your PC, of course, having a second reader on your display is largely superfluous.
We've already covered some of the features on the specifications page, but we're going to take a closer look at the display here and provide images from various angles. Assembling the display is extremely simple: after removing the three major pieces from the box (the display as well as the two parts of the base stand), you first attach the circular base to the mounting arm and lock it into place using the provided screw on the bottom of the stand. After that all you have to do is insert the top of the LCD mounting mechanism into the stand and then lower it until it snaps into place.
 |
 |
| Click to enlarge | |
The base stand provides five inches of vertical travel, which gives you a reasonable amount of height adjustment. The stand also allows you to rotate the LCD and use it in portrait mode. While we can't say using a 24" LCD in portrait mode is something we found to be particularly useful, some people might feel otherwise. One of the great things about having such a large LCD is that it gives you the ability to view two documents (or document pages, web pages, etc.) side-by-side with room to spare, making portrait mode largely unnecessary.
 |
| Click to enlarge |
With the display in portrait mode, you don't get quite as much vertical travel, and cable routing can be a bit trickier as well. The display supports auto rotate functionality, so as soon as you rotate the display Windows will automatically recognize the new orientation and change your resolution as appropriate. It is unlikely that this functionality works outside of Windows, due to a lack of native drivers for other operating systems, but we did not actually test this functionality outside of Windows; regardless, as stated already we don't find portrait mode to be particularly necessary on widescreen displays.
 |
| Click to enlarge |
Here you can see a shot of the display with the optional speaker bar installed. The speaker bar attaches to the bottom of the LCD and receives power via a short cable that connects to the rear of the main display. The speakers only support stereo audio inputs (standard 1/8" DIN or RCA jacks), but they can try to emulate 3D surround sound if you'd like and the overall quality is pretty good given their size. There are plenty of better sounding speaker options available for $70 or less, but one nice benefit of the attached speaker bar is that you get reasonable quality audio without taking up much desk space. If you're more concerned with eliminating cable clutter than with getting premium quality audio, we would definitely add the speaker bar to a purchase of this display. The speakers also have the potential disadvantage of making portrait mode more difficult to access, so if you do intend to use the portrait mode we would forgo purchasing the speaker attachment.
 |
 |
| Click to enlarge | |
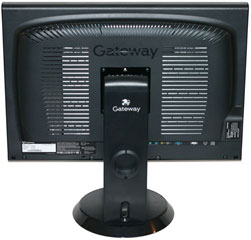
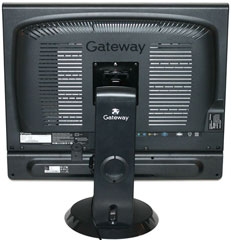
Here you can see the rear of the unit, with or without the speaker bar. The back of the base stand also includes a small ring that can be used to aid in cable routing. If you would rather do without the base stand, you can of course remove the mounting bracket and use a standard VESA wall mount instead.
 |
 |
| Click to enlarge | |
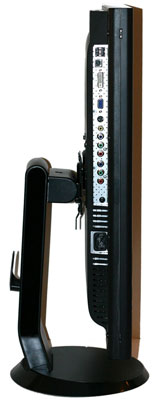
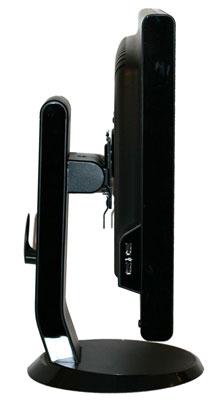
All of the input ports are located on the back of the unit, facing downward. One of the advantages of being able to rotate the display is that it makes it easier to install the cables initially. The only ports not located on the bottom of the display are two additional USB ports which are located on the left side. The ability to have the display function as a USB hub can be useful, although personally we prefer the integrated flash memory readers found on competing Dell LCDs. Flash memory readers are cheap, but integrating them into the display is one more way of eliminating cable clutter. If you have a flash reader integrated into your PC, of course, having a second reader on your display is largely superfluous.


77 Comments
View All Comments
jbr65n - Friday, March 14, 2008 - link
I purchased this monitor 11/2007. In 2/2008, the monitor completely died. I called Gateway and they refused to send me a new monitor. they would only send a refurb. (customer service reps were nasty, arrogant, and rude, when you do not agree with them they hang up on you).The second monitor did not work right out of the box, none of the touch control buttons lit up and they did not work, I had no way to turn the monitor on or off.
They sent a third refurb unit, and again, right out of the box, the backlight kept turning off, I would have to cycle the power several times to get it to come back on and then it would only stay on for a few seconds. Tech support said they would take back the monitor and the speaker bar add-on (since the speaker only worked on this one monitor) and refund my money for both. He transferred me to customer service to process the refund and returns and they changed there mind and said they will not give a refund. When I asked how long this was going to go on, there reply was "until I get a unit the works"
In all fairness, this is a nice monitor, but three bad ones in a row, and there lack of proper customer service, is enough to make anyone think twice!
timelag - Saturday, March 10, 2007 - link
Thanks, Jarred, for the informed review. A selfish request--could you review the current Dell, Apple, and Samsung 23/24" LCDs? A friend is in the market in the next couple months and I am buying before the end of the year. From what little looking I've done, these seem to be the best candidates so far for hobbyist photo work (and movie viewing, game playing, web browsing...).strikeback03 - Monday, March 5, 2007 - link
I purchased this monitor over the weekend at a local Best Buy. Here are my results from calibrating with the Pantone/greatagmacbeth Eye-One Display 2 colorimeter using the Eye-One Match 3.6.1 software.First I calibrated according to their instructions, which include driving the contrast to 100%. I had to go into user color and lower each color channel to 59 (default was 100) to get the brightness down. The brightness meter stated that it was at the target 120 cd/m^2, though the results show differently. Here are the results for the calibration:
http://img.photobucket.com/albums/v315/strikeback0...">http://img.photobucket.com/albums/v315/strikeback0...
And here is the validation results as an image of an Excel page. The Eye-One software does not give an easy way to directly export a graph, so colors tested are labeled by both RGB and Lab color values. Dunno how these compare to the values the Monaco Optix package uses, but by it's tests the results were quite good.
http://img.photobucket.com/albums/v315/strikeback0...">http://img.photobucket.com/albums/v315/strikeback0...
As the fist image shows though, the colorimeter was doing a lot of adjustment at the dark end of the spectrum, and video suffered from crushed blacks. So I tried changing brightness and contrast until video looked good, then recalibrating. Settings used here were brightness of 76 (with individual color channels still set to 59) and contrast of 60.
http://img.photobucket.com/albums/v315/strikeback0...">http://img.photobucket.com/albums/v315/strikeback0...
Much less work is being done to dark colors now, video looks good, and the dE is even lower now:
http://img.photobucket.com/albums/v315/strikeback0...">http://img.photobucket.com/albums/v315/strikeback0...
Brightness is still a little higher than recommended, but not much above what turned out following their procedure exactly.
Ferris23 - Tuesday, February 27, 2007 - link
I have this display and love it, but something I like to know about all my displays is how to access the service menu. Usually there are extra options that allow even more fine tuning with color etc...Do you have any connections that would be able to tell you the way to enter a service menu on this display?
Gateway "tech support" has no idea what I am asking and just send me spec sheets or links to what the OSD looks like.
JarredWalton - Wednesday, February 28, 2007 - link
Not sure what more could be done to fine tune the display. If you go to the user settings you can adjust RGB colors, but being an LCD it doesn't really make a difference whether you do that on the LCD or in the Windows drivers. They both end up accomplishing the same thing. I have never looked into "hidden service menus" on any of the LCDs I've used, I'm sorry to say.gandergray - Tuesday, February 27, 2007 - link
Jared:Thank you for the review. I'm very pleased that you will be reviewing monitors again. In your future LCD display reviews, I suggest that you identify the manufacturer and model of LCD panel in the monitor, and continue to identify the manufacturer and model of the signal processing chipset (you did in this review), as in Kristopher's November, 2003 "Dell UltraSharp 2001FP Preview: Gaming LCDs for the Masses" review. Finding information about an LCD monitor's panel and chipset is difficult at best. I suspect that many enthusiasts would often consider the panel type, brand and model when choosing monitors, if that information was readily available. In fact, I frequently read discussions about the merits of S-IPS panels over S-PVA panels. Additionally, would you also alert readers when a monitor manufacturer uses different types of panels in the same monitor, i.e., model. This practice is disconcerting; Consumers simply can't be certain that the specific model that they purchase will have a specific panel. I believe that a vocal outcry would eliminate or substantially reduce this practice.
Gandergray
gandergray - Tuesday, February 27, 2007 - link
My apologies-- Jarred.Googer - Monday, February 26, 2007 - link
Gateway offers a $29 extended three (3) year warranty for the FPD2485W making it the same as the Dell 2407WFP for $40 less.
JarredWalton - Monday, February 26, 2007 - link
The Dell is currently (or was last week) $675 with the three year warranty. The Gateway is $680 + $30 for a 3-year warranty. So right now, the Dell is clearly less expensive. If the price of the Dell goes back up (which is almost certainly will at some point), things change a bit.larciel - Friday, February 23, 2007 - link